There could be many business scenarios where such workflow could help automate the business processes. For example, loan request form (approved by the manager and finance), staff holiday request (approved by the manager and the HR).
Business Scenario
- Staff can submit a transport expense claim request to the manager for approval
- Not all the staff will have access to internet and Office 365 hence Office Manager should be able to complete the request on their behalf
- Once the expense is approved by the Manager, it should go to the Head of the Department for further review and approval
- Finance Department will only reimburse if the claim is approved by the HoD.
Solution
- Trigger a Flow when a new item is added to the SharePoint item
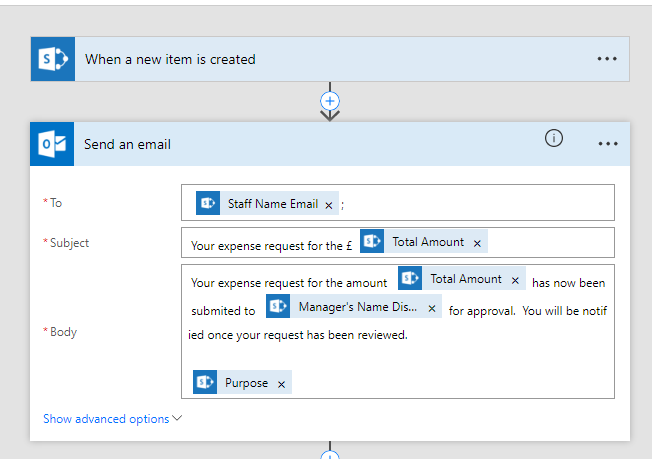
- Send an email to the staff confirming that a request has been submitted for an approval
- Start an approval process for the Manager to approve or reject the request.
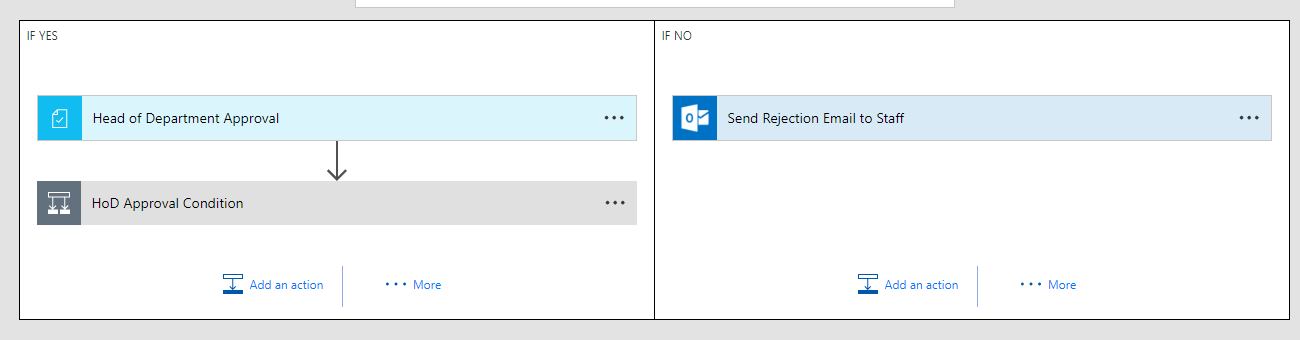
- If approved, start another approval process for the Head of the Department to approve or reject the request
- If approved, send an email to the user copied to the Manager and the Finance Department
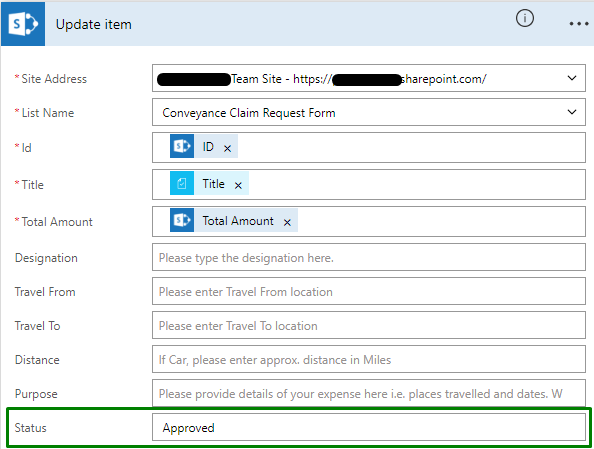
- Update the SharePoint list item Status to Approved.
- If Rejected, send an email to the user informing that request has been rejected with the reasons provided by the manager.
Implementation
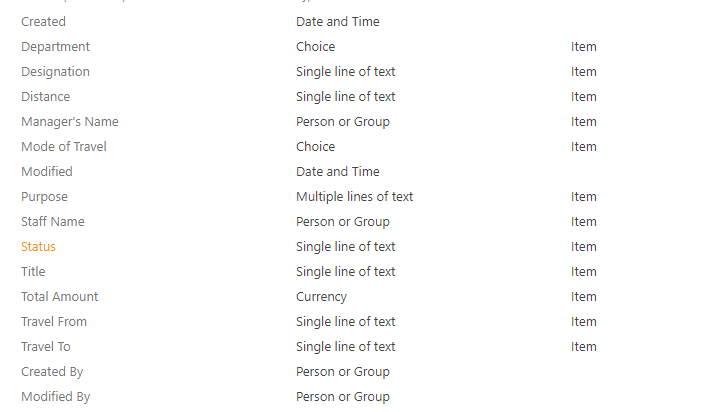
- Create a SharePoint List with the following columns. Note that I could use the field Created By but the fact that users might not Office license and request could be completed by the Office Manager on their behalf a Staff Name field is used. In addition, I could use User Profile to exact the name of the Manager, but in this situation, Active Directory had not such information maintained.
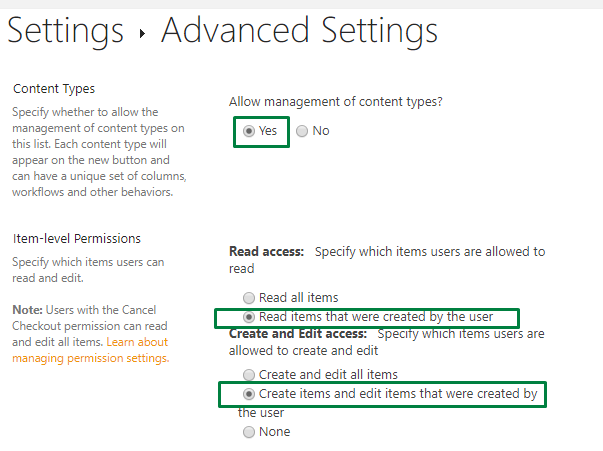
Enabled the Content Type. This will allow us to Hide the Title and Status Column. The Status column will be updated with the outcome of the HOD. This field will not appear in the ‘Edit’ or ‘New’ forms. It will only be updated through the workflow.
Permissions – Set an item level permission so the users can only see and edit their own items /request. You will need to give users ‘Contribute’ access for them to submit a request.
You might want to consider the following while preparing the list:
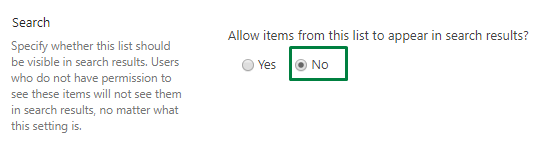
Disabled the Search – since the content does not need to be searched, it is better to disable this
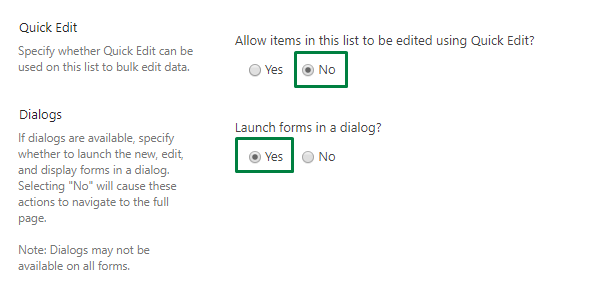
I have also enabled ‘Dialog Box’ and disabled ‘Quick Edit’
Creating a Flow for the process and approval
- The flow will trigger when a new item has been added to the list:
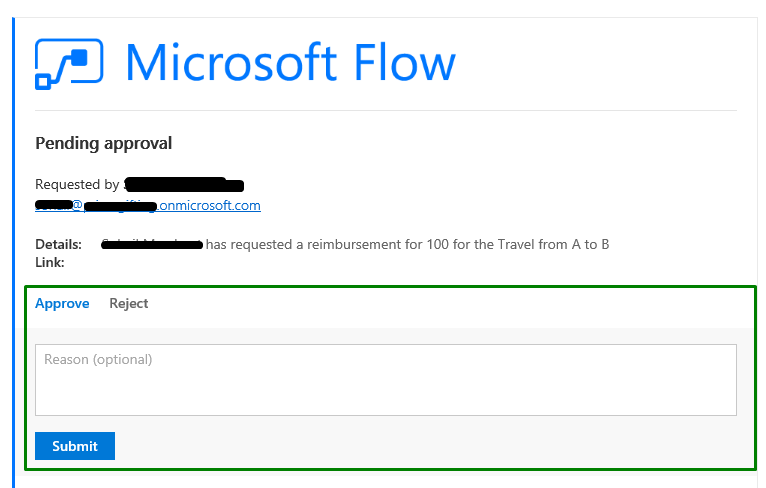
2. Start an approval process which will send an email to the Manager (name provided by the user in the Manager’s column)
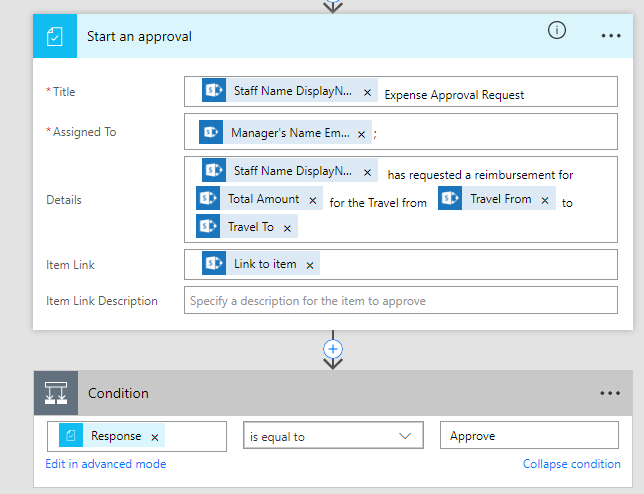
3. If the outcome of this request is ‘Approve’ start another Approval Process for the Head of the Department
4. Once it has been approved an email confirmation is sent to the user requested, manager and the finance department to reimburse.
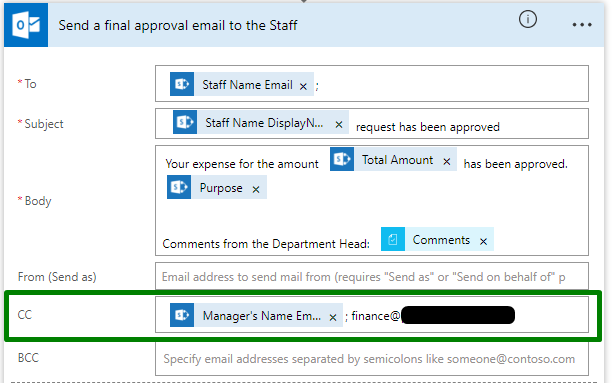
5. Manager receiving a request for approval can Approve or Reject directly from Outlook email which is great as this wasn’t very easy with SharePoint Designer. You can also use the comment provided by the Manager in a response email sent to the staff requesting.
Optional Steps:
Update the item Status with the results:
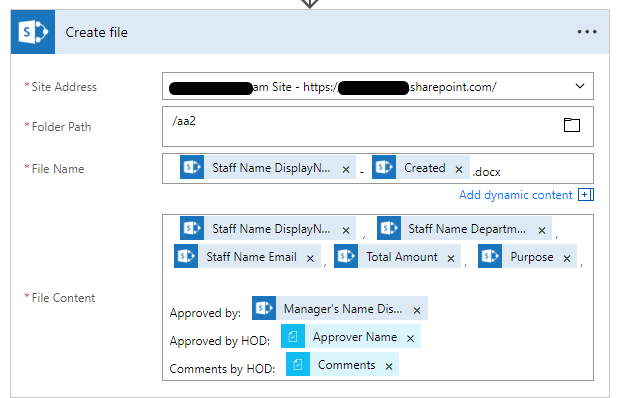
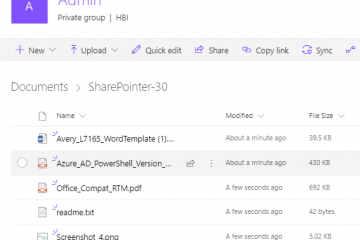
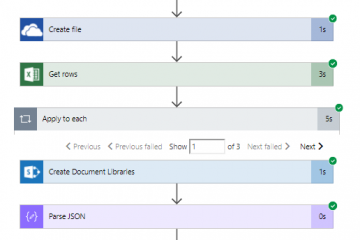
One possibly requirement could be that after a request has been approved, the user is not allowed to make changes. This was possible with SharePoint Designer Impersonation where you can change the permission. This is currently not possible with MS Flow but you could move the item to another list. For more details, see my previous blog or you can create a file with all the details in an another library which Finance department could only have access. For example:

4 Comments
Dominic · August 3, 2017 at 15:29
this worked very well and did exactly what I wanted it to do, much better and easier to use that SP designer
thanks
SharePointer · August 6, 2017 at 21:08
Glad to know that this article helped! Thanks
Mathew Cox · September 26, 2018 at 05:34
Hi, How do I hide the content type ‘item’ on new button?
SharePointer · April 9, 2019 at 21:30
Under list setting, you can change the ‘Change New Button Order’