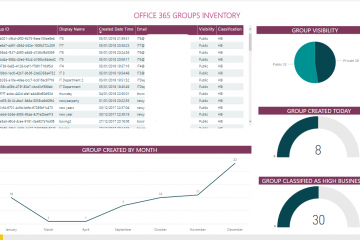
Office 365 Groups is a very powerful membership service (as Microsoft is now calling it) to promote collaboration within organisations. Since many organisations are adopting Office 365 Groups fast and one of the main concerns is around how to control the creation without creating bottlenecks or bureaucratic process. With Office 365 Group, we get a SharePoint site and other apps also like Planner, Yammer and Power BI.
One possible way is to use Office 365 Graph API and MS Flow to automate the process yet have a chance to review and approve the creation of groups. There is another way which is using Azure Functions recently posted by Martina Grom here.
Here are the steps:
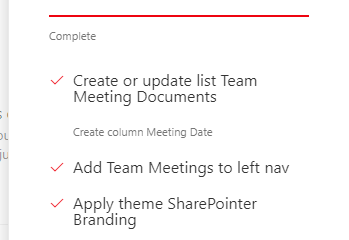
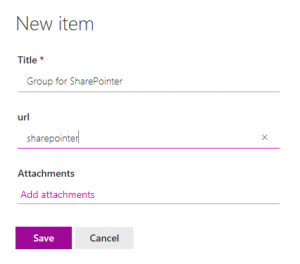
- Create a SharePoint custom list with number of fields required or appropriate for your requirements
- Create an approval process so the following steps only execute if it is approved by the admin.
- Register a Graph API application in the Azure Active Directory
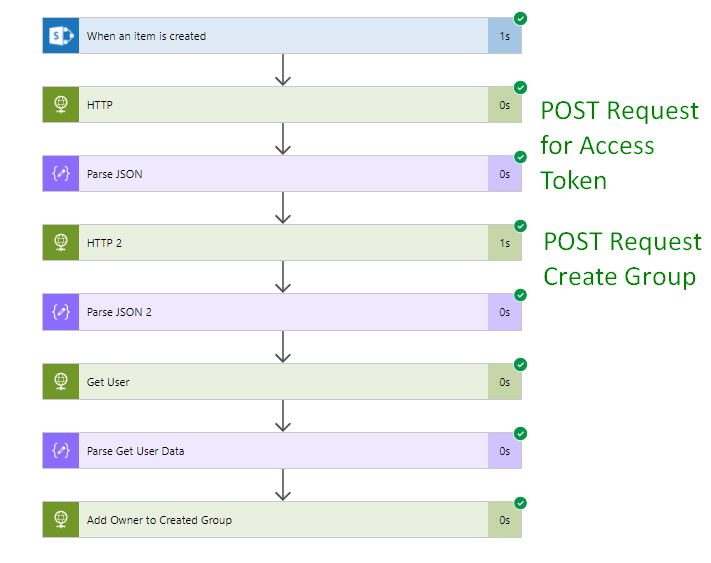
- Trigger the Ms Flow when a new item is created by the user
- Make a POST request to Graph API endpoint to get an access token
- Make a POST request to create a group
- Make a GET request to retrieve the user object, who made the requested (through user created the item)
- Make a POST request to assign the user (received from step 6) as the owner of the group
- Send a confirmation email
To keep the focus on the key area of the process, Step 1, 2, 4 and 9 have not been covered in this blog, but there is enough information available on the internet to help if required.
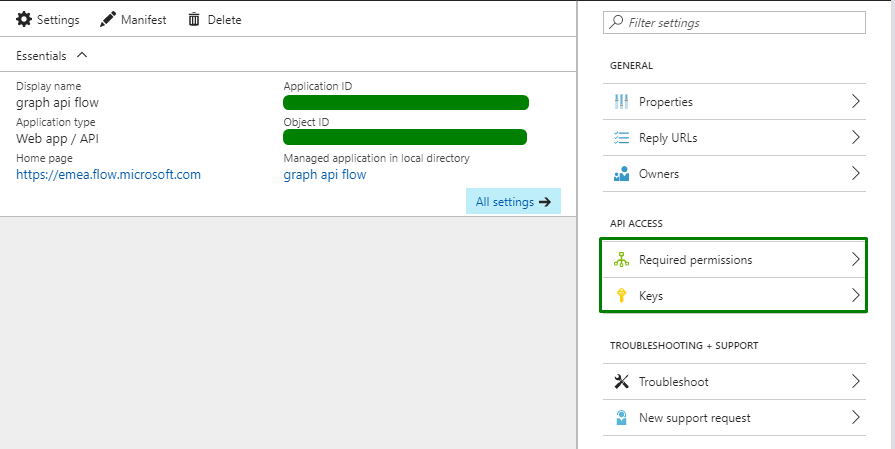
STEP 3 – Register an Azure Active Directory App
We will need to register an application (web app API) in the Azure Action Directory and grant appropriate permission. You will need the following information when the application is created:
client_id: which is the Application ID
client_secret: you will need to create a secret key by clicking ‘Key’
resource: https://graph.microsoft.com
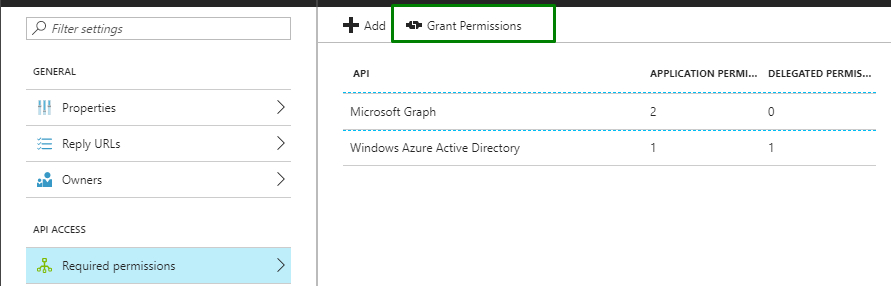
After the application is registered you will need to click ‘Grant Permissions’ button this will grant permissions to all the accounts in your directory.
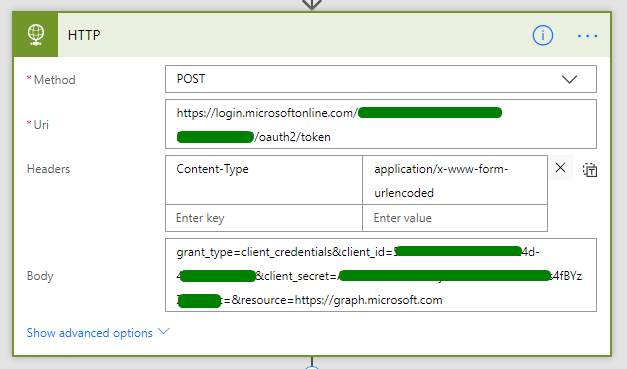
STEP 5 – Make a POST request to Graph API endpoint to get an access token
We will need the following:
- URI that would be: https://login.microsoftonline.com/{tenant ID }/oauth2/token
- Body, we will pass the following information required – replace the information in the { } with your application:
grant_type=client_credentials&client_id={YOUR APPLICATION ID}&client_secret={YOUR CLIENT SECRET}&resource=https://graph.microsoft.com - Content-Type in the Headers should be “application/x-www-form-urlencoded”
More information about the Graph API Authentication here
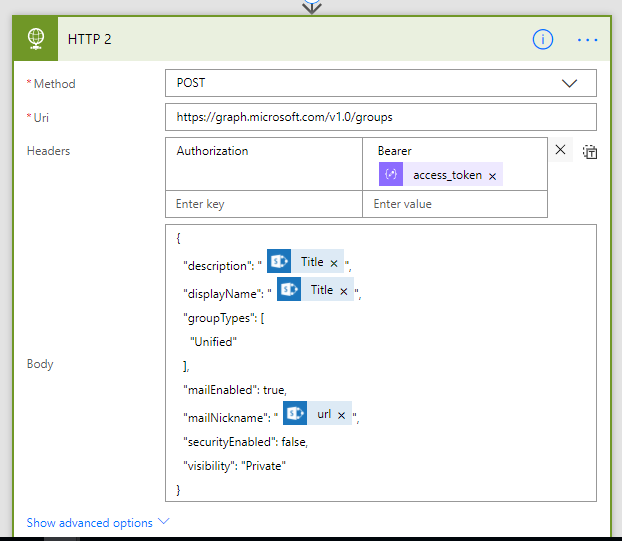
STEP 6 – Make a POST request to create an Office 365 group
- To make a POST request to Graph API end-point Uri : https://graph.microsoft.com/v1.0/groups
- We will receive an access_code from the previous step which will need to provide in the header: Authorization: Bearer access_code
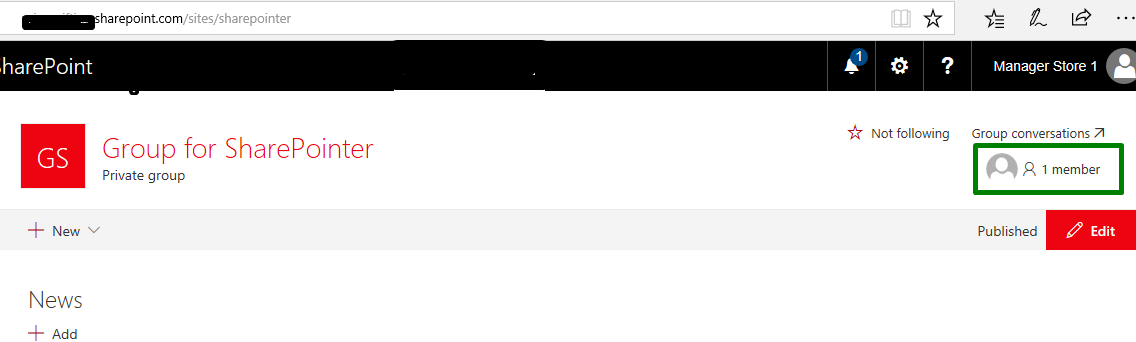
- JSON object with the following details which will be passed in the Body section. Two things particular to note i) mailNickname would be the url of the SharePoint site created e.g. https://yourtenant.sharepoint.com/sites/mailNickname and ii) visibility, in this case, all the groups created as ‘Private’, you can change it to ‘Public’ if you wish.
{
“description”: “Description for the Group”,
“displayName”: “Name of the Group”,
“groupTypes”: [ “Unified” ],
“mailEnabled”: true,
“mailNickname”: “short-url”,
“securityEnabled”: false
“visibility”: “Private”
}
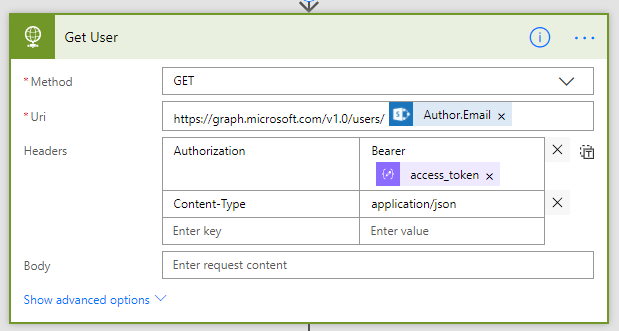
STEP 7 – Make a GET request to retrieve the user id
To get the user object which will help us assign the owner of the group. I am getting this through user email address. We will again need two things:
- This time it will be GET request URI for the Graph API https://graph.microsoft.com/v1.0/users/{Created Email}. We can get the created email from the SharePoint item created
- Authorization: Bearer access_code
More information about Graph API user here
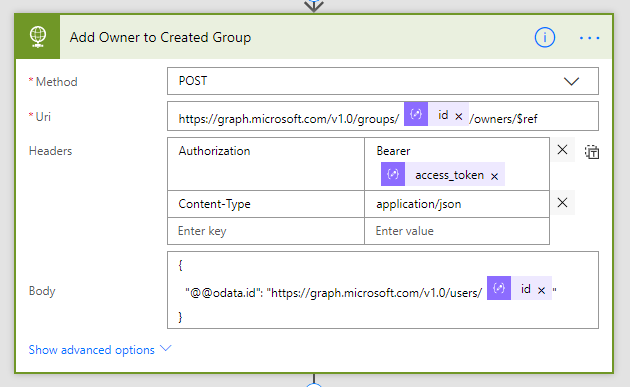
STEP 8 – Make a POST request to Add an Owner of the Group
In this step, we will five things:
- URI https://graph.microsoft.com/v1.0/groups/{GROUP ID}/owners/$ref – Note that Group ID
- group id – we will get this STEP 6
- user id received from STEP 7
- Authorization: Bearer access_code
- Body: {“@@odata.id”: “https://graph.microsoft.com/v1.0/users/{id}”} – Note I have added two @@ as Flow language, will treat this as action to escape @ we will need to add another@. The id provided in the body is the user id.
More information about Graph API add owner here
Here is the screenshot for all the steps.
If this is helpful, please comment, share, tweet or like.